事前準備
- /etc/yum.conf
- /~/.bash_profile
まずはこの二つのファイルを編集しておきます。
Proxyサーバを使用している環境だと、
この先の手順で失敗するので先に設定しておきましょう。
Proxyサーバを使ってない場合は、ここの設定は不要です。
|
1 2 3 4 5 6 |
[main] gpgcheck=1 installonly_limit=3 clean_requirements_on_remove=True best=True proxy=http://192.168.XXX.XXX:8080 # プロキシサーバがある場合はこの行を追加 |
|
1 2 3 |
# 最後の行に以下を追加 export http_proxy=http://192.168.XXX.XXX:8080 export https_proxy=http://192.168.XXX.XXX:8080 |
|
1 |
# source ~/.bash_profile |
sourceコマンドで環境変数を読み込んでおきます。
必要ソフトウェアのインストール
|
1 2 3 4 5 |
# dnf -y update # dnf -y groupinstall "Development Tools" # dnf -y install openssl-devel readline-devel zlib-devel curl-devel libffi-devel subversion # dnf -y install postgresql-server postgresql-devel # dnf -y install httpd httpd-devel |
dnfコマンドで必要なパッケージをインストールしてゆきます。
Rubyをインストール
|
1 2 3 4 5 6 7 8 9 10 |
# cd /opt/ # wget https://cache.ruby-lang.org/pub/ruby/2.6/ruby-2.6.5.tar.gz # tar zxvf ruby-2.6.5.tar.gz # cd ruby-2.6.5/ # ./configure --disable-install-doc # make # make install # cd .. # ruby -v ruby 2.6.5p114 (2019-10-01 revision 67812) [x86_64-linux] |
Rubyは公式サイトからパッケージをダウンロードしてきて、
ソースコードからビルドします。
bundlerをインストール
|
1 2 3 4 |
# gem install bundler -p http://192.168.1.80:8080 --no-doc Fetching bundler-2.1.4.gem Successfully installed bundler-2.1.4 1 gem installed |
PostgreSQLの初期化
|
1 2 |
# postgresql-setup initdb # vim /var/lib/pgsql/data/pg_hba.conf |
DB初期化コマンドを実行した後に、pg_hba.confを編集します。
|
1 2 3 4 5 6 |
# If you want to allow non-local connections, you need to add more # "host" records. In that case you will also need to make PostgreSQL # listen on a non-local interface via the listen_addresses # configuration parameter, or via the -i or -h command line switches. host redmine redmine 127.0.0.1/32 md5 #追記 host redmine redmine ::1/128 md5 #追記 |
コメントアウトされた部分のすぐ下に追記をしておきます。
|
1 2 3 4 5 |
# systemctl start postgresql # systemctl enable postgresql Created symlink /etc/systemd/system/multi-user.target.wants/postgresql.service → /usr/lib/systemd/system/postgresql.service. # sudo -u postgres createuser -P redmine # sudo -u postgres createdb -E UTF-8 -O redmine -T template0 redmine |
postgresqlを起動し、ユーザとデータベースを新規作成します。
Redmineインストール
|
1 2 3 4 5 |
# cd /opt/ # wget https://www.redmine.org/releases/redmine-4.0.6.tar.gz # tar zxvf redmine-4.0.6.tar.gz # mv redmine-4.0.6 /var/lib/redmine # cd /var/lib/redmine\n |
Redmineのパッケージをダウンロードします。
後の作業を考えて、ディレクトリ名を変えておきます。
|
1 2 3 4 5 6 7 8 9 10 |
# vim config/database.yml --- production: adapter: postgresql database: redmine host: localhost username: redmine password: "<dbpassword>" encode: utf8 --- |
DBの接続情報を設定しておきます。
|
1 2 3 4 5 6 |
# bundle install --without development test rmagick --path vendor/bundle # bundle exec rake generate_secret_token # RAILS_ENV=production bundle exec rake db:migrate # RAILS_ENV=production REDMINE_LANG=ja bundle exec rake redmine:load_default_data # gem install passenger -v 5.1.12 --no-doc # passenger-install-apache2-module --auto --languages ruby |
アプリケーションをデプロイします。
httpdへの設定
|
1 2 3 4 |
# vim /etc/httpd/conf/httpd.conf --- DocumentRoot "/var/lib/redmine/public" # 書き換える --- |
httpdの設定ファイルを編集します。
|
1 2 3 4 5 6 7 8 9 10 |
# passenger-install-apache2-module --snippet # vim /etc/httpd/conf.d/redmine.conf --- <directory "/var/lib/redmine/public"> Require all granted ## passenger-install-apache2-moduleコマンドで出力された結果を書き込む ## --- # systemctl restart httpd # systemctl enable httpd |
--snippetで出力された結果を/etc/httpd/conf.d/redmine.confとして保存しておきます。
保存できたらhttpdを再起動しておきましょう。
動作確認

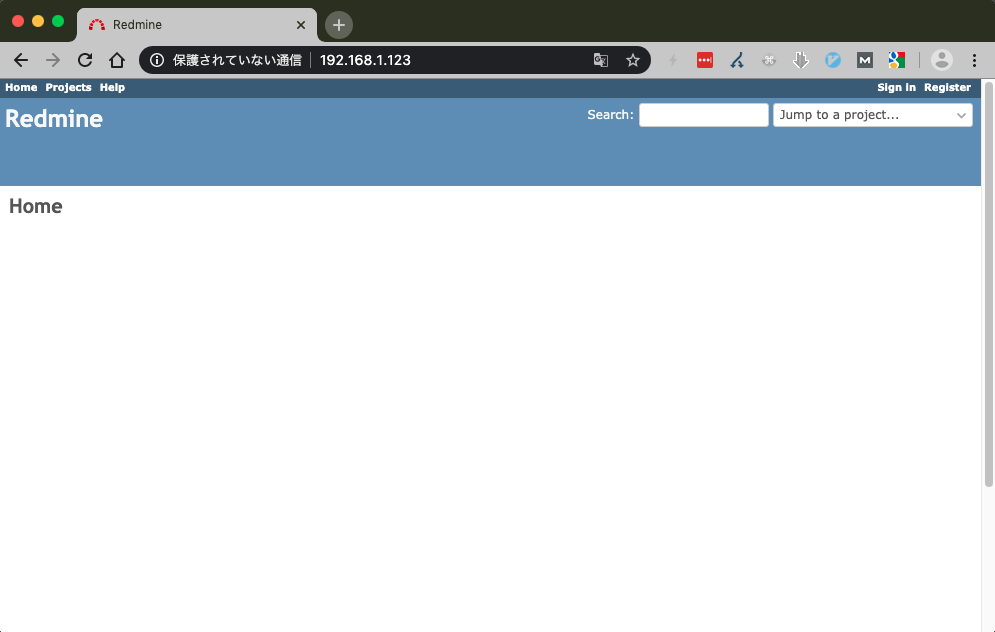
Redmineを立ち上げたサーバにIPアドレスでアクセスしましょう。
画像のようにトップページが出力されていれば、構築作業完了です。